Where to find it
- Open
KOL→ click New KOL.
Steps
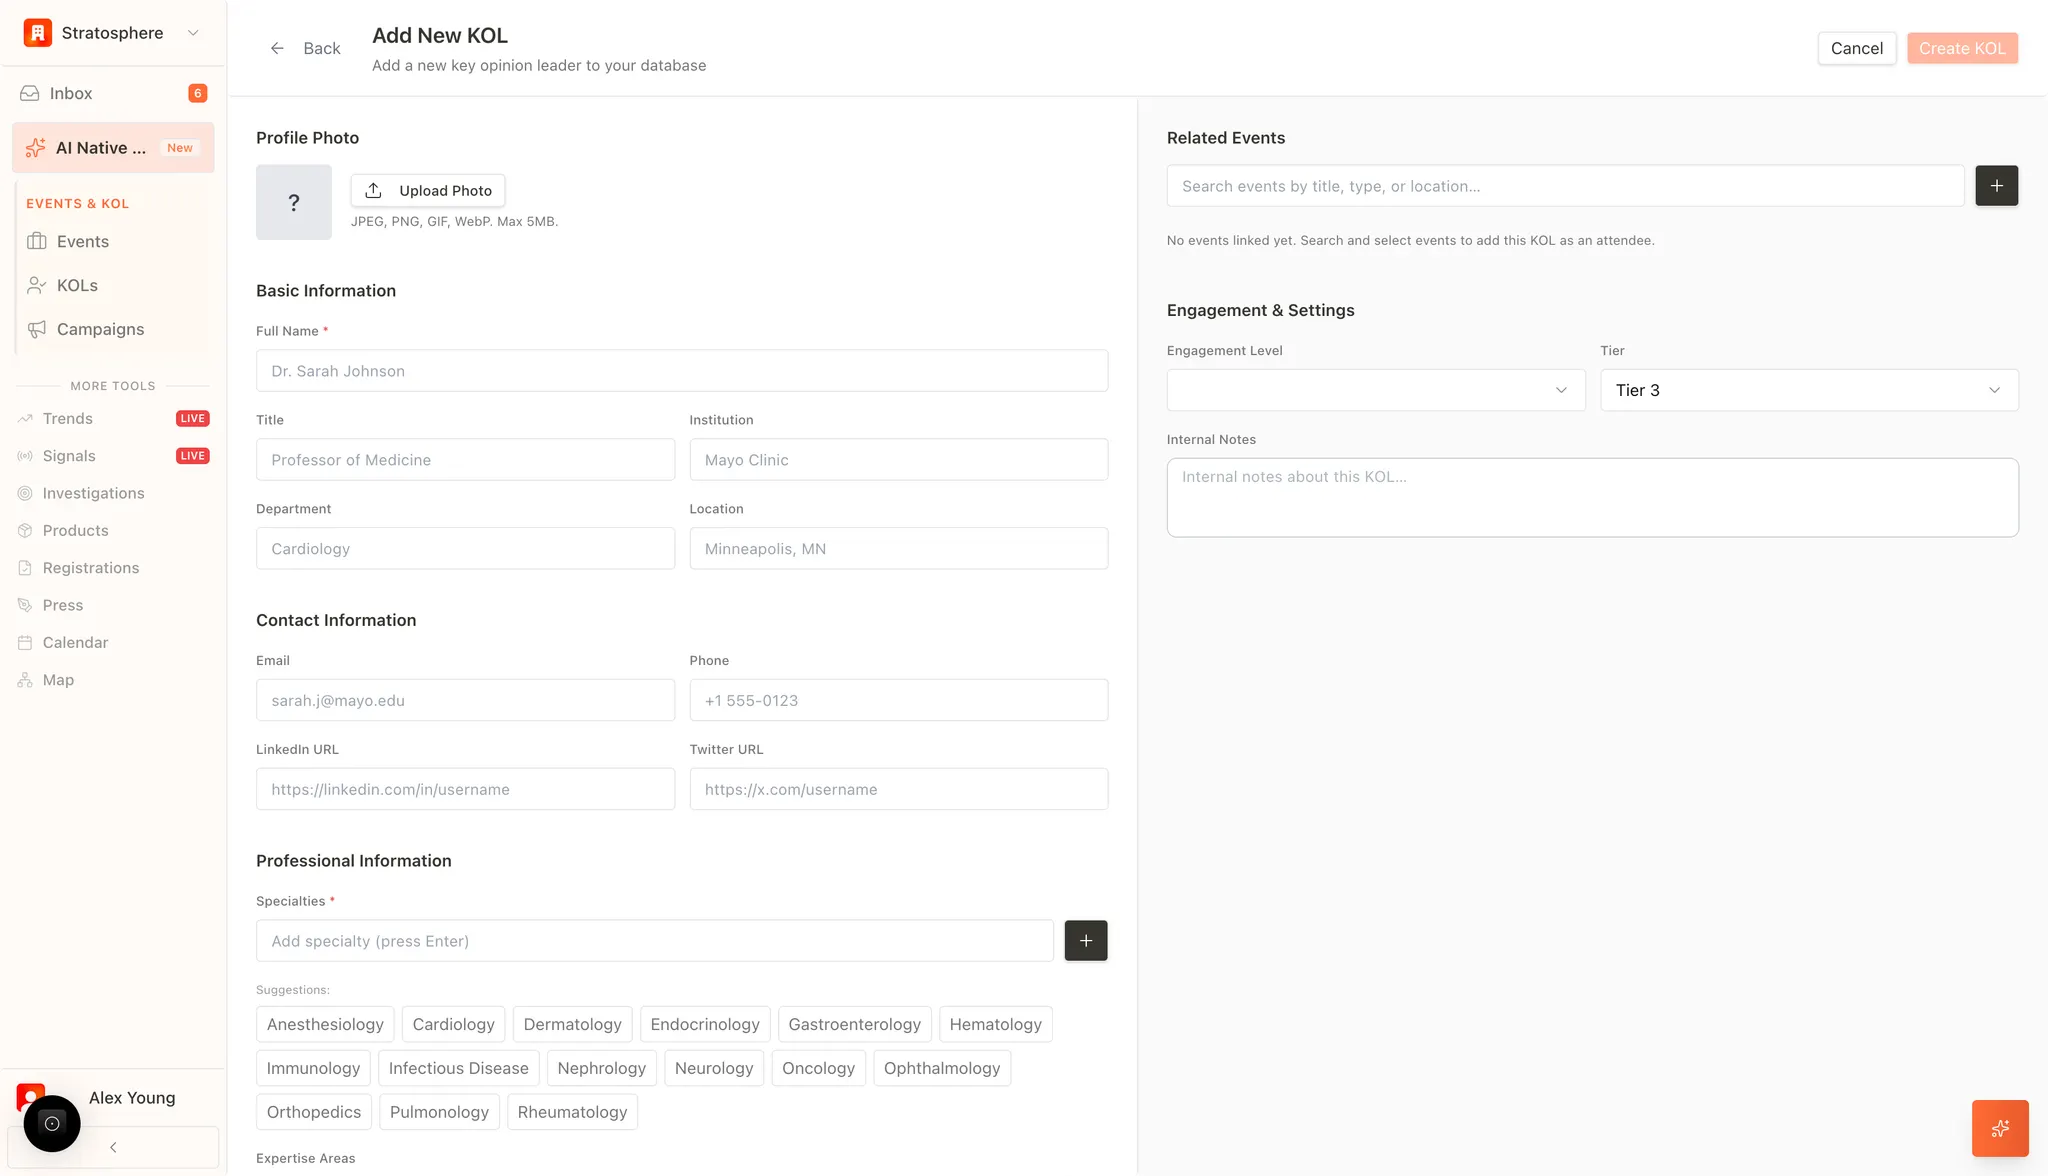
- Upload a profile photo (optional).
- Fill in basic identity and role details.
- Add contact and social links.
- Add specialties and expertise tags.
- Set tier and engagement level, then save.
Profile and basic information
- Profile Photo: Users can upload a professional headshot. Supported formats include JPEG, PNG, GIF, and WebP, with a maximum file size of 5MB.
- Core Identity: Capture the expert’s Full Name (required), professional Title, and current Institution.
- Logistical Data: Define the specific Department and Location (City/State) to facilitate regional filtering and reporting.
Contact and social information
To ensure reliable outreach, the system provides fields for multiple communication channels:- Direct Contact: Input professional Email addresses and Phone numbers.
- Digital Presence: Include LinkedIn and Twitter (X) profile URLs to monitor the expert’s social influence and professional updates.
Professional expertise
- Specialties: Users can define the KOL’s clinical or academic focus. The system provides a “Suggestions” panel (e.g., Anesthesiology, Cardiology) for standardized tagging. Multiple specialties can be added to a single profile.
- Expertise Areas: Provides additional granular space to document specific research interests or clinical niche areas.
Engagement and strategic settings
This section defines how the organization interacts with the KOL:- Related Events: Search for and link the KOL to existing events within the system. This establishes a historical record of participation.
- Engagement & Tiering: Assign an Engagement Level (e.g., High, Medium, Low) and a strategic Tier (e.g., Tier 1, Tier 2, Tier 3) to categorize the KOL’s importance to organizational objectives.
- Internal Notes: A dedicated space for confidential qualitative data, allowing team members to document specific preferences, past interactions, or relationship nuances.
Save
- Create KOL: Once all mandatory and relevant fields are populated, select the “Create KOL” button to commit the data to the database.
- Cancel: Reverts all changes and returns the user to the primary KOL Management list without saving.
Related resources
- KOL Management overview: Search, filter, and manage KOL profiles.
- Import KOLs from CSV: Bulk import experts from a spreadsheet.
- KOL tiering methodology: Classify experts by influence and engagement potential.
- Public KOL profile page: Share a public-facing expert profile.